Posts

Wanna-cry-ransomware

Do those following things in the windows system. 1.  Block port 138.139,445 with the firewall. 2. How to enable or disable SMB protocols on the SMB server:     Windows 7, Windows Server 2008 R2, Windows Vista, and Windows Server 2008       To enable or disable SMB protocols on an SMB Server that is running Windows 7, Windows Server 2008 R2, Windows Vista, or Windows Server 2008, use Windows PowerShell or Registry Editor.      Windows PowerShell 2.0 or a later version of PowerShell     To disable SMBv1 on the SMB server, run the following cmdlet:         Set-ItemProperty -Path "HKLM:\SYSTEM\CurrentControlSet\Services\LanmanServer\Parameters" SMB1 -Type DWORD -Value 0 -Force     To enable SMBv1 on the SMB server, run the following cmdlet:         Set-ItemProperty -Path "HKLM:\SYSTEM\CurrentControlSet\Services\LanmanServer\Parameters" SMB1 -Type DWORD -Value 1 -Force -: Windows Vista, Windows Server 2008, Windows 7, Windows Server 2008 R2, Windows 8,

How to download Virtual machine image of google cloud to local computer

======================================================================== Command to download Virtual machine image of google cloud to local computer. ======================================================================== 1.Download GoogleCloudSDKInstaller.exe and install in windows computer. 2.Configured Gcloud credential and region. 3.If you don't have any bucket then create one bucket to  store exported image. 4.Run below command in gcloud cli: gcloud compute images export --destination-uri gs://my-bucket/my-image.tar.gz \ --image my-image --project my-project or gcloud compute images export --destination-uri gs://my-bucket/my-image.tar.gz --image my-image --project_ My First Project 5. After finish, you can download the exported image of the virtual machine from gcloud bucket. ========================================================================

Email Junk ISSUE Help.

======================= Email Junk ISSUE Help. ======================= 1. Your IP Address Was Used for Spam -Even if you never send spam yourself, your emails could get flagged as spam if your IP address was used by someone else for spam. 2. Your Subscribers Don’t Remember You -The second most common reason that emails never reach the inbox (affecting 21% of emails) is spam complaints. -Every time a subscriber reports an email as spam–even if it isn’t really spam–this complaint gets recorded by the mailbox provider. Once the complaints exceed a certain threshold, all future campaigns skip the inbox and get sent directly to the spam folder. 3. Your Subject Line is Misleading -As the CAN-SPAM act states(https://www.gpo.gov/fdsys/pkg/PLAW-108publ187/html/PLAW-108publ187.htm_, it is actually against the law to intentionally mislead someone with your subject line in order to induce them to view the message. -In a survey conducted by Litmus and Fluent (https://litmus.c

Convert the PV instance into an HVM instance

============================================= Convert the PV instance into an HVM instance ============================================= If copying data from the PV instance to a new HVM instance doesn’t suit your needs, you can convert a PV instance into an HVM instance by following these steps: Note: These are general guidance steps. Be sure to modify the steps as needed for your configurations. 1. Stop the PV instance. Note: We recommend that you perform this step on a test PV instance. To create the test instance, first create an image of your PV instance. Then, launch a new PV instance from the image. 2. Create a snapshot of the PV instance’s root volume. 3. Restore the PV instance's root volume snapshot as a new EBS volume. The volume must be restored in the same Availability Zone as the PV instance. 4. Launch a new instance from an Amazon Linux HVM AMI. The instance must be launched in the same Availability Zone as the PV instance. 5. Choose the EBS

Hosting node.js applications in IIS

Image
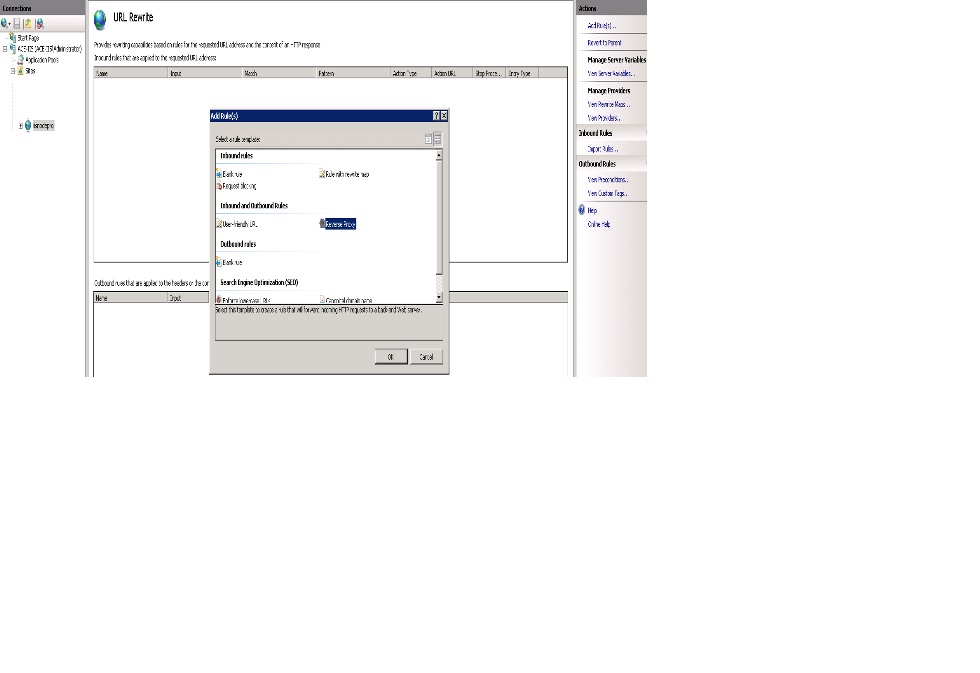
Hosting node.js applications in IIS Setup new site on IIS web server and bind your domain name on node application directory path. Setup Url Rewrite rule of Reverse proxy for your node application port. (Like 3000 or any)  From above screen shot, you can add Reverse proxy rule directly from IIS Manager or You can put below configuration in web.config. <?xml version="1.0" encoding="UTF-8"?> <configuration> <system.webServer> <rewrite> <rules> <rule name="ReverseProxyInboundRule1" stopProcessing="true"> <match url="(.*)" /> <conditions> <add input="{CACHE_URL}" pattern="^(https?)://" /> </conditions> <action type="Rewrite" url="{C:1}://localhost:3000/{R:1}&qu

Multiple PHP version on the same server using php-fpm on Ubuntu16.04

Image
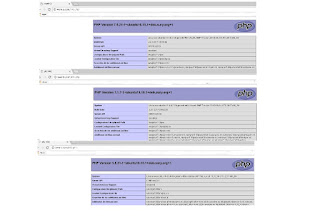
Run multiple PHP version on the same server using php -fpm on Ubuntu16.04 After some Google research and some my modification this solution finally worked for me: Install PHP 5.6, 7.0 and 7.1 as fpm Install php 5.6 , php 7.0 and php7.1 fpm sudo su add-apt-repository ppa:ondrej/php apt-get update apt-get install libapache2-mod-fastcgi php5.6 php5.6-fpm php5.6-dev php5.6-mbstring php5.6-mcrypt php5.6-mysql php5.6-zip php5.6-gd php5.6-xml php5.6-curl php5.6-intl php5.6-json php7.0 php7.0-fpm php7.0-dev php7.0-mbstring php7.0-mcrypt php7.0-mysql php7.0-zip php7.0-gd php7.0-xml php7.0-curl php7.0-intl php7.0-json php7.1 php7.1-fpm php7.1-dev php7.1-mbstring php7.1-mcrypt php7.1-mysql php7.1-zip php7.1-gd php7.1-xml php7.1-curl php7.1-intl php7.1-json Enable all necessary Apache modules: a2enmod actions a2enmod fastcgi Making PHP-FPM use By default PHP-FPM is listening on the socket /var/run/php/php7.0-fpm.sock. It is also possible to make PHP-FPM use a TCP connection

Install MongoDB Community Edition on Ubuntu

--> install mongodb community edition 1. Import the public key used by the package management system.  sudo apt-key adv --keyserver hkp://keyserver.ubuntu.com:80 --recv 0C49F3730359A14518585931BC711F9BA15703C6 2. Create a list file for MongoDB. -> Ubuntu 12.04: echo "deb [ arch=amd64 ] http://repo.mongodb.org/apt/ubuntu precise/mongodb-org/3.4 multiverse" | sudo tee /etc/apt/sources.list.d/mongodb-org-3.4.list -> Ubuntu 14.04: echo "deb [ arch=amd64 ] http://repo.mongodb.org/apt/ubuntu trusty/mongodb-org/3.4 multiverse" | sudo tee /etc/apt/sources.list.d/mongodb-org-3.4.list ->Ubuntu 16.04 echo "deb [ arch=amd64,arm64 ] http://repo.mongodb.org/apt/ubuntu xenial/mongodb-org/3.4 multiverse" | sudo tee /etc/apt/sources.list.d/mongodb-org-3.4.list 3 Reload local package database.     sudo apt-get update 4 Install the MongoDB packages.     sudo apt-get install -y mongodb -org 5 Start MongoDB.      sudo service mongod start 6 Verify that MongoDB h